How to Install WordPress on a Subdomain or Addon Domain Using cPanel
Installing WordPress on a subdomain or addon domain via cPanel is a straightforward process, ideal for creating separate sites or staging environments. This guide walks you through both methods, utilizing cPanel's built-in tools like Softaculous or WP Toolkit.
Prerequisites
- cPanel Access: Ensure you have access to your hosting account's cPanel.
- Subdomain or Addon Domain: Set up your subdomain (e.g.,
blog.example.com) or addon domain (e.g.,example2.com) in cPanel
Install WordPress on a Subdomain/Addon Domain
Step 1: Create the Subdomain/Addon Domain
How to create subdomain using cPanel?
This action creates a directory (e.g., public_html/subdomain) for subdomain domain and sets up the necessary DNS records.
Step 2: Install WordPress via Softaculous
- In cPanel, go to Software > WordPress Manager by Softaculous.
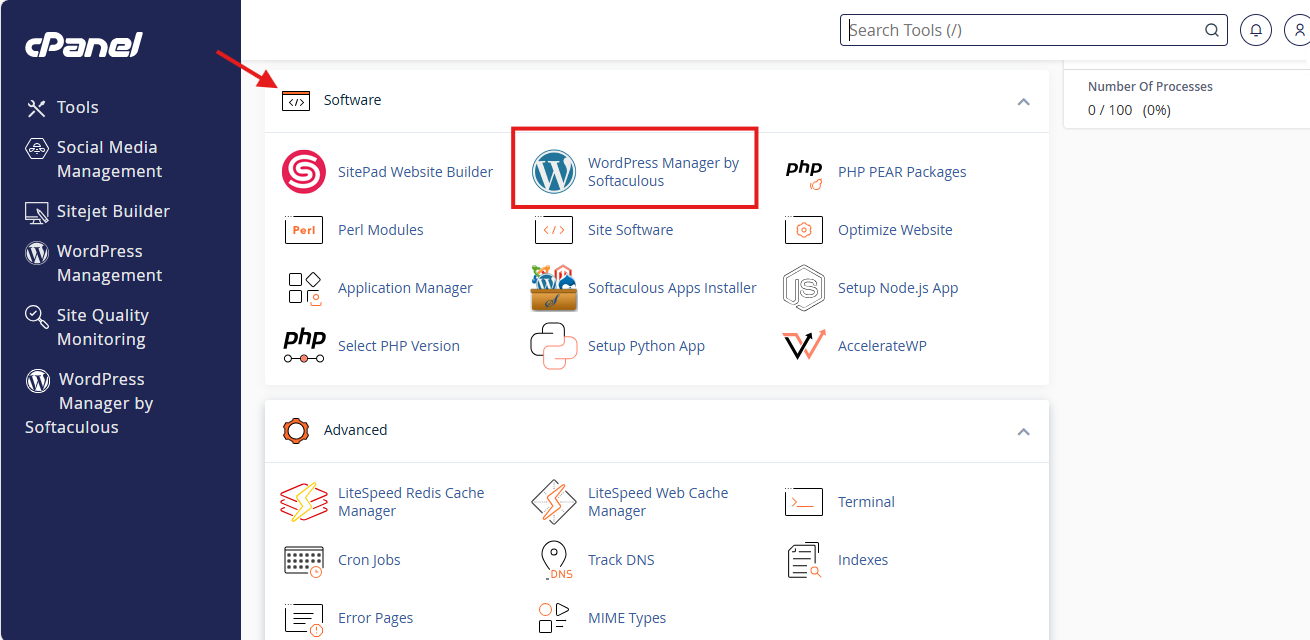
- Click on the WordPress icon.
- Click on the Install button.
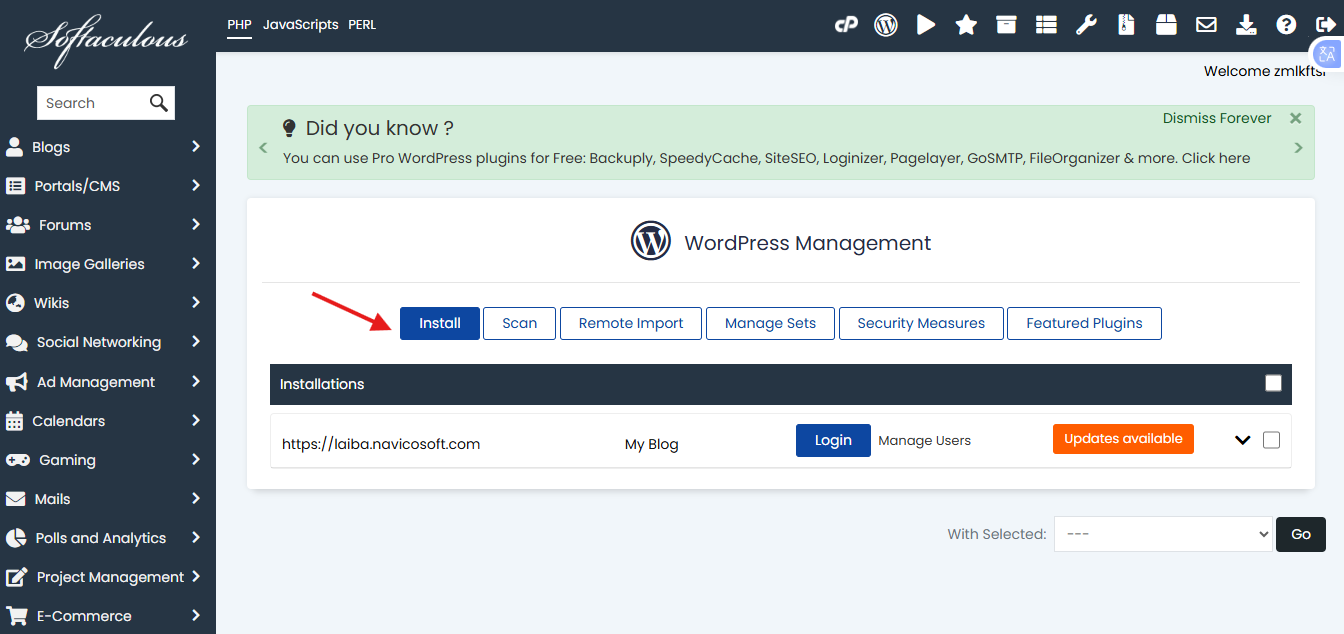
- In the Choose Installation URL section, select your subdomain from the dropdown menu.
- Fill in the site settings, admin username, and password.
- After installation, you can access your WordPress site at e.g http://laiba.kashif.

Post-Installation Tips
- SSL Certificate: Ensure your site uses HTTPS by installing an SSL certificate.
- Permalinks: Set up SEO-friendly URLs by configuring permalinks in the WordPress dashboard under Settings > Permalinks.
- Themes and Plugins: Customize your site by selecting a theme and installing essential plugins.
- Backups: Regularly back up your site using plugins or cPanel's backup tools.
By following these steps, you can successfully install WordPress on a subdomain or addon domain using cPanel, allowing you to manage multiple sites efficiently within a single hosting account.