Step-by-Step Guide to Installing IIS on Windows Server 2022
If you're planning to host websites, APIs, or internal web apps on Windows Server 2022, installing Internet Information Services (IIS) is your first step. IIS is Microsoft's flexible, secure, and robust web server platform. This article walks you through two easy ways to install IIS using the graphical interface (Server Manager) and using PowerShell.
Why Use IIS?
IIS supports:
- Static and dynamic content (HTML, ASP.NET, PHP, etc.)
- SSL/TLS for secure websites
- Authentication and authorization options
- Logging, diagnostics, and advanced performance features
It’s ideal for both internal enterprise apps and public-facing websites.
Method 1: Installing IIS Using Server Manager (GUI)
Step 1: Open Server Manager
Click Start, then select Server Manager. Wait for it to fully load.

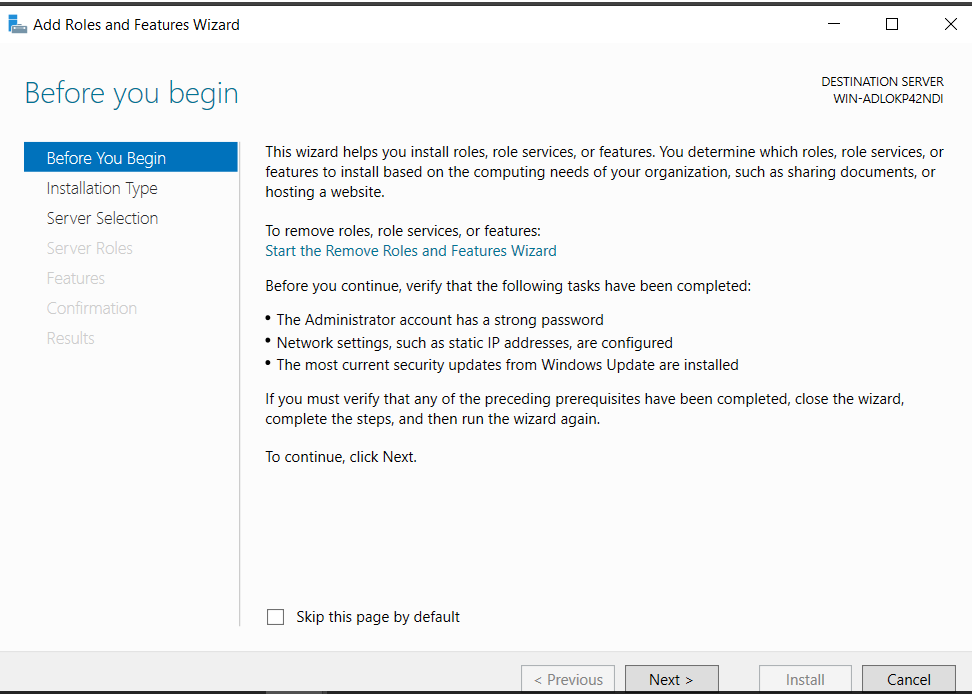
Step 2: Launch the Add Roles and Features Wizard
In the Dashboard, click “Add roles and features” to open the wizard.
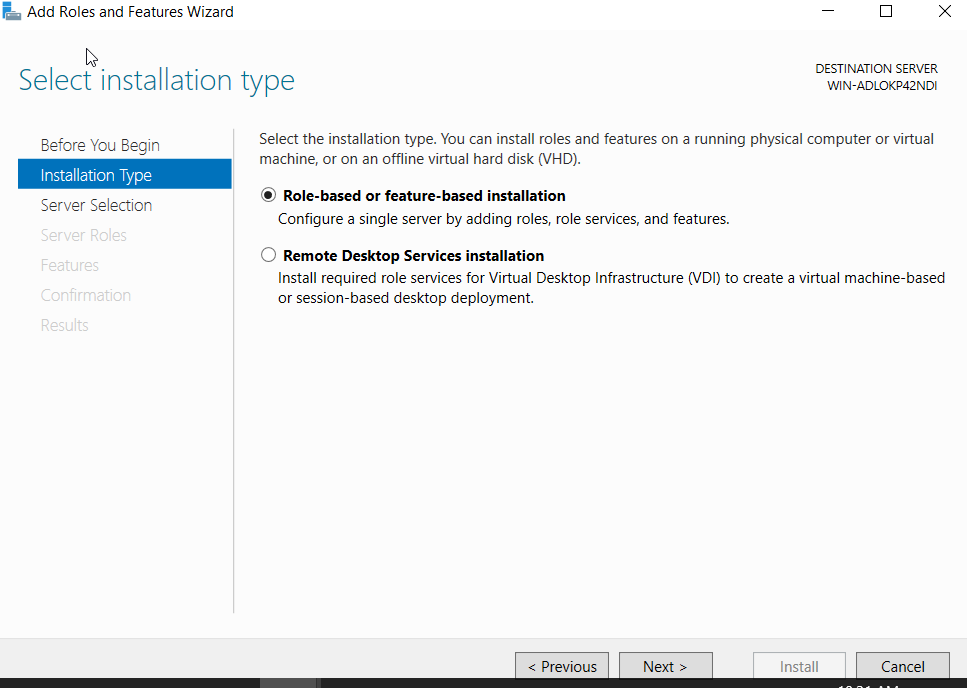
Step 3: Choose Installation Type
Select “Role-based or feature-based installation” and click Next.
Step 4: Select the Server
Choose your local server from the server pool. Click Next.
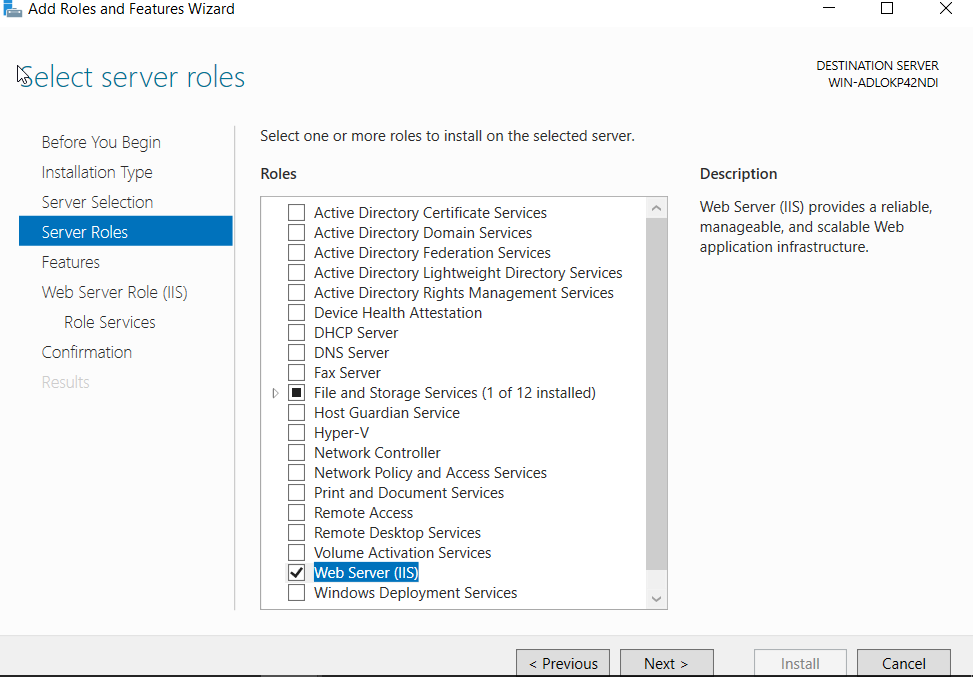
Step 5: Select Server Role
Scroll down and check “Web Server (IIS)”.
When prompted, click “Add Features” to include required dependencies. Click Next.
Step 6: Confirm Features
Keep the default features, or customize (e.g., enable ASP.NET, WebSockets). Click Next.
Step 7: Begin Installation
Click Install and wait until the process completes.
Once done, click Close.
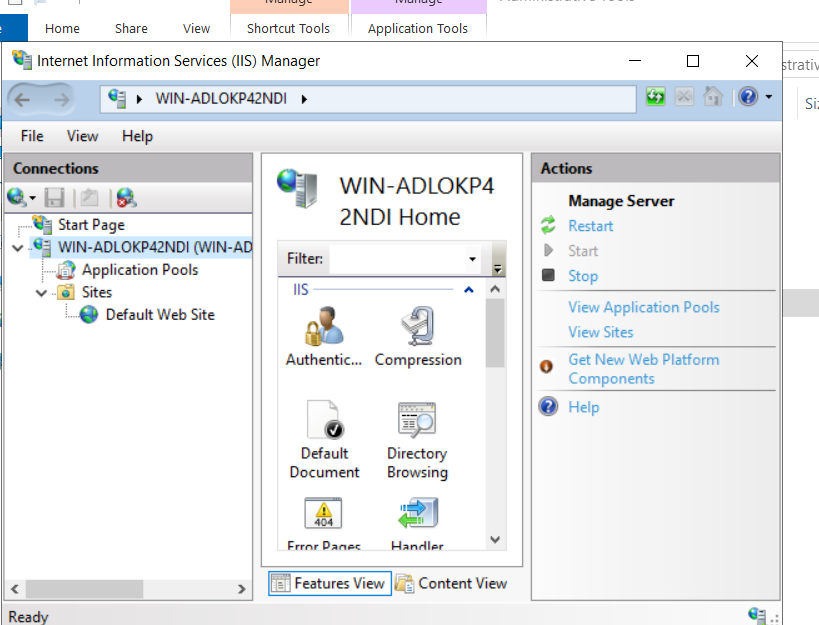
Step 8: Verify IIS Installation
Open a browser and go to http://localhost — you should see the IIS Welcome Page, confirming successful installation.
Method 2: Installing IIS Using PowerShell
If you're managing multiple servers or prefer automation, PowerShell is the fastest way.
Step 1: Open PowerShell as Administrator
Right-click the Start button and select Windows PowerShell (Admin).
Step 2: Run the Installation Command
Install-WindowsFeature -Name Web-Server -IncludeManagementTools
This installs IIS along with management tools like the IIS Manager GUI.
Step 3: Confirm IIS is Installed
Check installation status with:
Get-WindowsFeature Web-Server
The Installed status confirms it's active.
Step 4: Open in Browser
Go to http://localhost to view the default IIS page.
Optional: Install Additional IIS Features
Depending on your app, you might need to enable extra modules. Here are some common ones:
# Enable ASP.NET 4.8
Install-WindowsFeature Web-Asp-Net45
# Enable Static Content and Default Documents
Install-WindowsFeature Web-Static-Content, Web-Default-Doc
# Enable WebSockets for real-time apps
Install-WindowsFeature Web-WebSockets
Conclusion
Installing IIS on Windows Server 2022 is simple whether you prefer a GUI or command-line approach. Once set up, IIS can host everything from basic websites to enterprise-grade applications with advanced features like SSL, logging, and load balancing.
After installation, don’t forget to:
- Secure your server (e.g., enable HTTPS)
- Configure logging and monitoring
- Keep your server patched and up to date
Now you're ready to deploy your first web application on a rock-solid Windows Server foundation.