Configuration Checklist for IIS After Installation on Windows Server 2022
After successfully installing Internet Information Services (IIS) on Windows Server 2022, your next crucial step is configuration. A default IIS install runs—but it’s far from production-ready. Without proper setup, you risk security vulnerabilities, performance bottlenecks, and misconfigurations that could affect your hosted applications.
This article walks you through a practical, focused initial configuration checklist to get your IIS environment secure, stable, and ready for real-world use.
1. Confirm IIS is Installed and Running
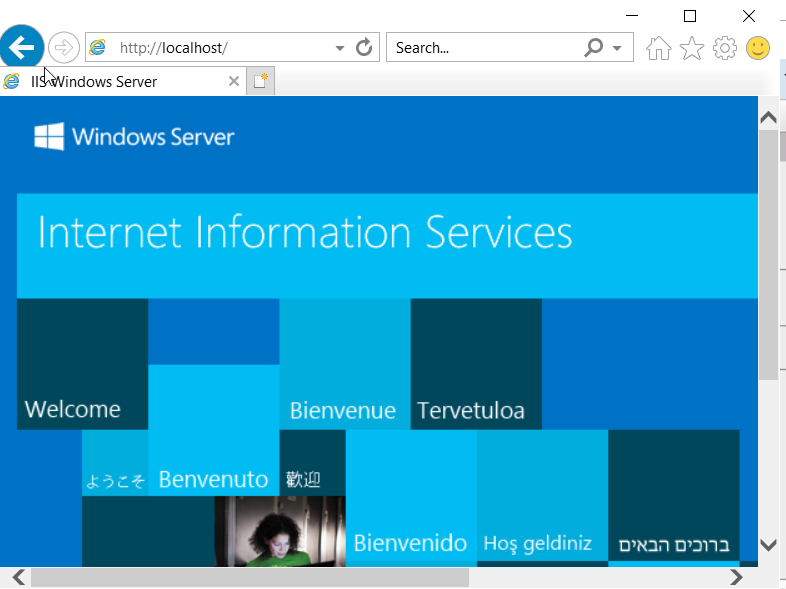
Start by making sure IIS is properly installed.
- Open a browser and go to:
http://localhost - You should see the IIS default welcome page
You can also run:
Get-WindowsFeature -Name Web-ServerThis will show the role status as Installed.
2. Remove Unused Features and Modules
By default, IIS installs multiple features you may not need. Each unused module increases the attack surface.
Use Server Manager or PowerShell to remove modules you don’t require:
Remove-WindowsFeature Web-WebSocketsKeep only what your application needs: e.g., Static Content, ASP.NET, or WebSockets.
3. Harden Security Settings
Before hosting anything, secure the server:
- Disable Directory Browsing
- In IIS Manager > Your Site > Directory Browsing > Disable
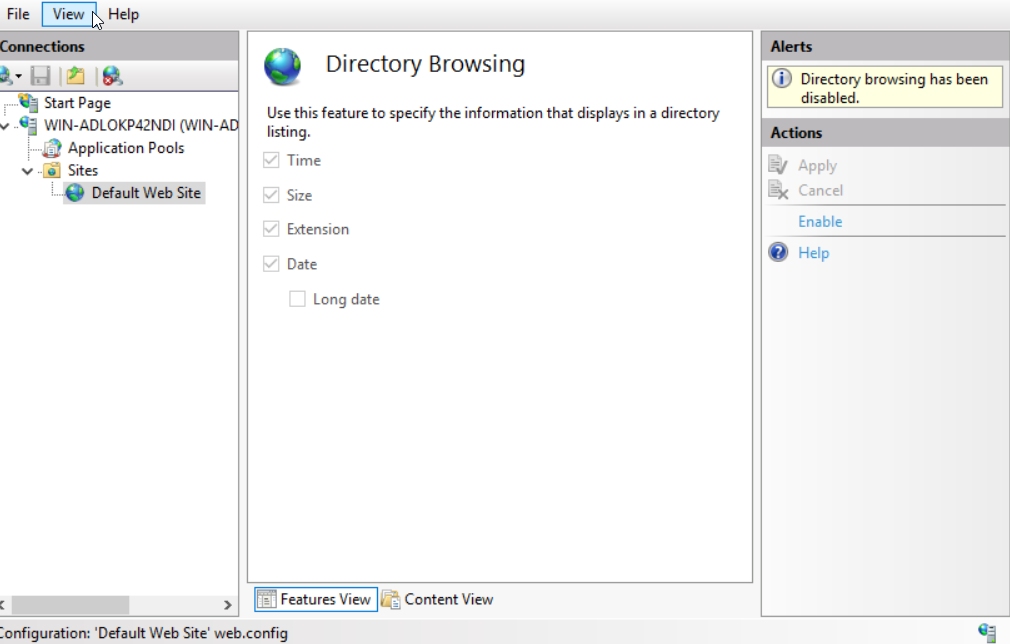
- In IIS Manager > Your Site > Directory Browsing > Disable
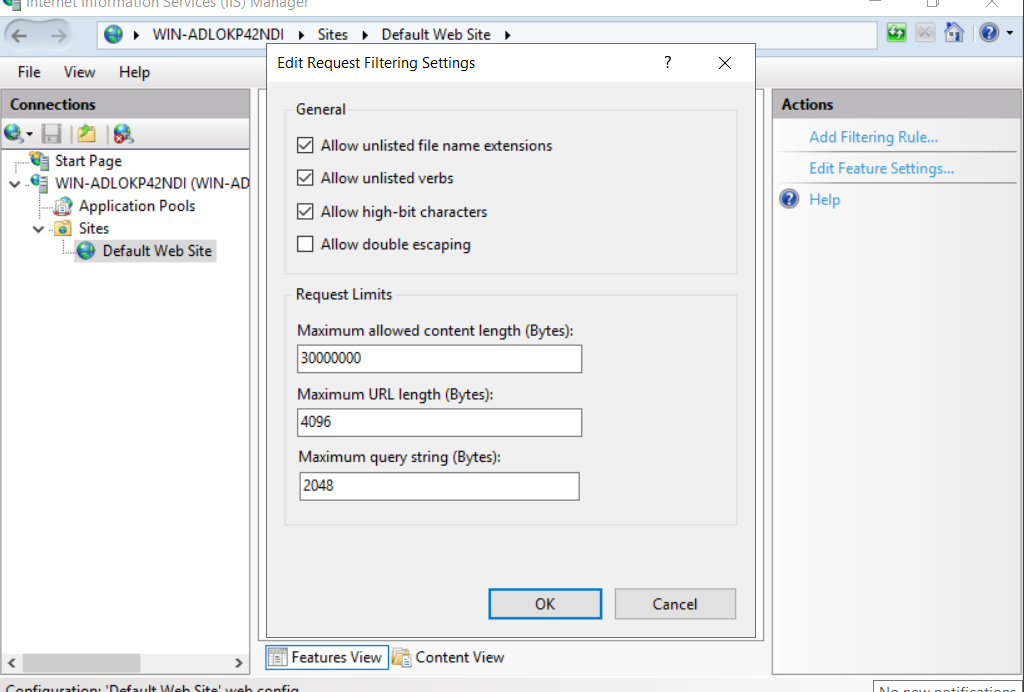
- Enable Request Filtering
- Block double extensions (e.g.,
.asp;.exe) - Restrict long URLs and query strings
- Block double extensions (e.g.,
Review NTFS permissions on your web root (C:\inetpub\wwwroot) — avoid giving Everyone full access.
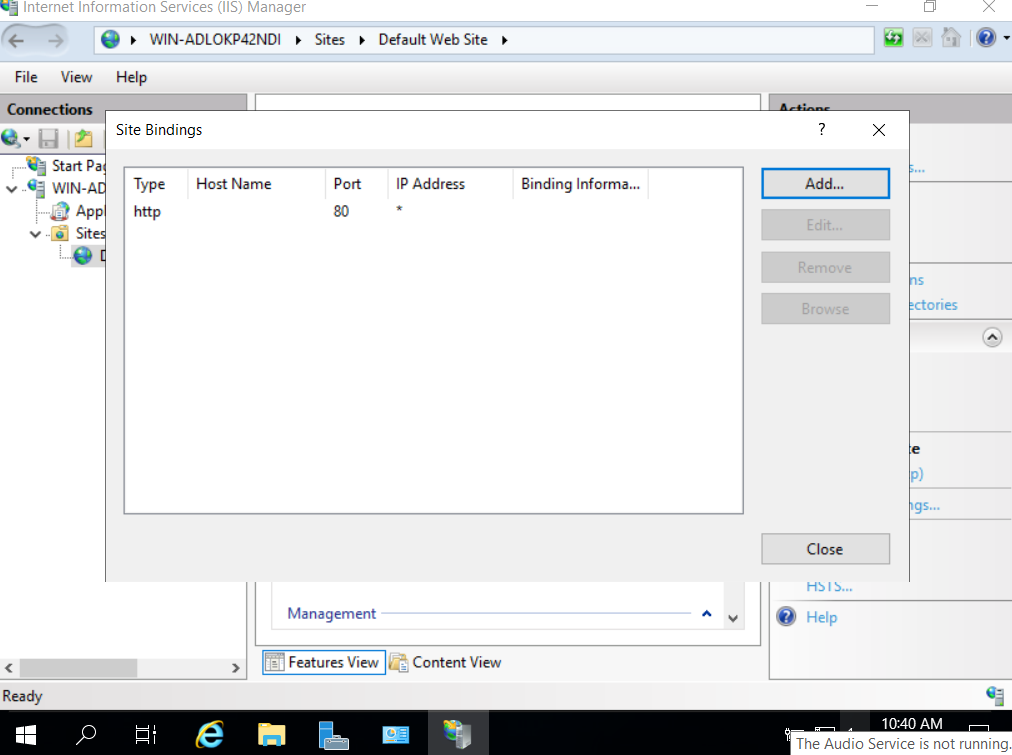
4. Configure Website Bindings
By default, IIS creates a single “Default Web Site” on port 80.
To host multiple apps or domains:
- Open IIS Manager
- Go to Sites > Your Site > Bindings
- Add hostnames and ports as needed (e.g.,
myapp.company.localon port 80 or 443)
If hosting public sites, ensure DNS is configured to point to your server.
5. Set Up Application Pools
IIS uses Application Pools to isolate apps.
- Use separate pools for each app
- Use ApplicationPoolIdentity (safer than LocalSystem)
- Recycle pools regularly to free up memory
To configure:
- Go to Application Pools in IIS Manager
- Right-click a pool > Advanced Settings
6. Configure Logging
IIS logs are vital for auditing and troubleshooting.
- In IIS Manager > Your Site > Logging
- Set log file format to W3C
- Set log path (default:
C:\inetpub\logs\LogFiles) - Enable log file rollover (by time or size)
Make sure logs are being collected and stored securely.
7. Customize Default Documents and MIME Types
- Default Document: Make sure your app’s entry point (e.g.,
index.html,default.aspx) is listed and prioritized. - MIME Types: Add types needed for modern front-end apps (e.g.,
.json,.woff2).
You can manage both in the Features View of your site in IIS Manager.
8. Install and Bind an SSL Certificate (Optional but Recommended)
To enable HTTPS:
- Install a valid SSL certificate (from a CA or self-signed for testing)
- In IIS Manager, go to Site > Bindings
- Add an HTTPS binding and assign your certificate
You can also force HTTPS redirection using URL Rewrite or configuration files.