How to Manage Customer Announcements Using the Navicosoft Domain Reseller Portal
Customer announcements are a powerful way to share updates. Follow the steps below to manage them effectively:
Step 1: Log In to the Navicosoft Domain Reseller Portal
- Open your web browser and go to the Navicosoft Domain Reseller Portal.
- Enter your login credentials (username and password).
- Click on the Login button to access your reseller account.
Step 2: Navigate to the Announcements Section
- Once logged in, locate the Customers section in the left-hand sidebar.
- Click on Customers to reveal the dropdown menu.
- Select Announcements from the dropdown menu.
Step 3: Manage Customer Announcements
- The Manage Customer Announcements page will appear.
- In the Send To field, select the user or users to whom you want to send the announcement.
- Fill in the Title field with a brief and clear title for the announcement.
- Write the details of the announcement in the Description field.
- Set the Start Date and End Date for the announcement—this defines the duration for which the announcement will be visible.
- Use the Preview option to review the announcement before finalizing.
- Once everything is complete, click on the Save Changes button to publish the announcement.
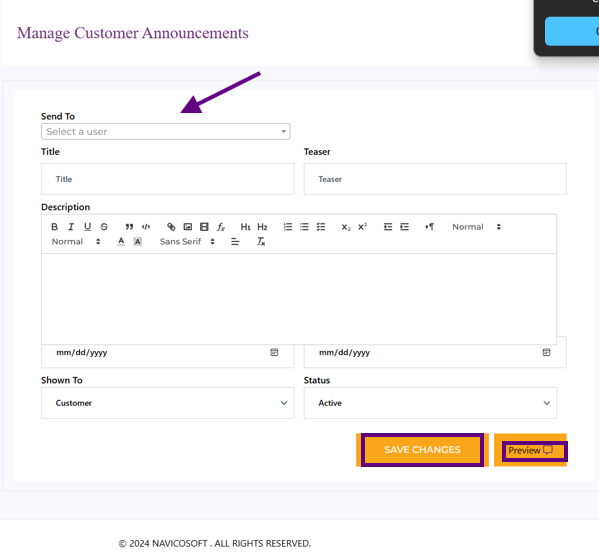
You can also select the Customer Status (e.g., Active or Inactive) to specify the target audience.