How to Run MTR on Windows and Linux
When diagnosing network connectivity issues, MTR (My Traceroute) is an essential tool. It combines the functionalities of traceroute and ping, allowing real-time analysis of the route packets take to a destination. This guide explains how to install and use MTR on both Windows and Linux systems.
What is MTR and Why Use It?
MTR helps identify network latency and packet loss by continuously sending packets to a target address and displaying real-time results. It is particularly useful for network administrators and IT professionals when troubleshooting connection issues.
Running MTR on Windows
Windows users can utilize WinMTR, a graphical version of MTR, to analyze network routes effectively.
Steps to Install and Use WinMTR
- Download WinMTR – Visit the official website and download the latest version.
- Install the Tool – Extract the files and install the program on your computer.
- Launch WinMTR – Open the application.
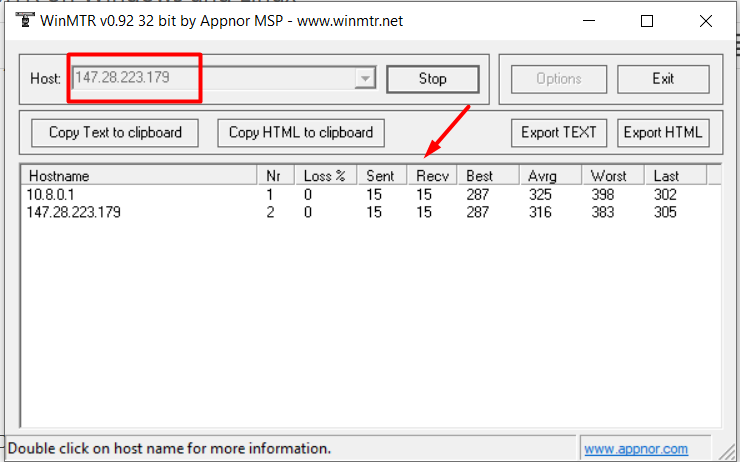
- Enter the Target Address – Type the destination server's IP address or domain name in the ‘Host’ field.
- Start the Test – Click on ‘Start’ to initiate network analysis.
- Analyze the Results – Observe the displayed information, checking for any delays or packet loss.
Running MTR on Linux
Linux users can install and run MTR directly from the terminal. The following steps guide you through the process.
Installing MTR on Linux
Depending on your Linux distribution, install MTR using the appropriate command:
For Debian/Ubuntu:
apt-get -y install mtrFor RedHat-based systems (CentOS, RHEL, etc.):
yum install mtr -yRunning MTR
Once installed, you can run the MTR command by executing:
mtr [your IP or domain]If you notice any issues, such as significant packet loss or high latency, please provide our Support Team with a screenshot of the output. We will investigate the issue for you.